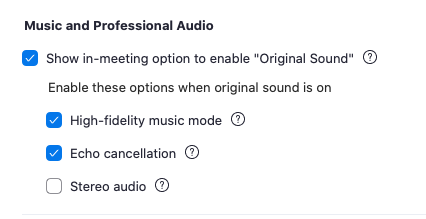
I just got a query from a student reporter, who asked, “did McGill provide professors with enough Zoom training this summer?”
I can only imagine what students are seeing!
The institution provided a lot of training. So much so that by mid summer I was “webinar-ed out.” Specifically, credit must go to Teaching & Learning Services, who really rose to the occasion. (And if I didn’t think they’d done a good job, I promise I would tell you. I’m not shy about criticizing the university.)
BUT, there are a number of other factors contributing to difficulties right now:
1. Zoom wasn’t designed as a teaching tool. It still isn’t, and some basic things (like the TAs and I going from group to group in our meeting yesterday) involve workarounds, and that is according to Zoom’s own manual! Keep in mind that in March, the company wasn’t any more prepared to deal with the pandemic than any other institution. They basically got lucky because their interface happened to handle group meetings a little differently than (eg) Skype, Microsoft Teams, and other options. 6 months sounds like a long time but it’s not when you’re talking about the sheer scale of the undertaking. On the first day of class at many US institutions (10 days before we started) Zoom crashed.
2. No amount of training or practice can fully prepare anyone for dealing with a new technical or social arrangement. It’s like performing on a musical instrument or playing a sport. There’s practice, and then there’s the heat of performance. I’ve been putting some part of my courses online since the 1990s (back then you had to hand-code a course website), and I have never worked harder to get my courses up and running than this term.
3. Now scale that up to a whole big university, and add in wide range of technical skill-levels and literacies among faculty.
So if the students are looking for someone to blame, I’d blame the virus first. Covid cost everyone something. If our main complaint is about some rocky first classes, we should count ourselves fortunate.
That said, I would expect things to smooth out in a couple weeks as people get used to it.*
EDIT: Also, people should feel free to complain to their friends and loved ones! The rule in our home is we can complain about anything we want whenever we want if it makes us feel better.
—
*One thing I didn’t say in the reply that I wish I did was that faculty are also people, and if you’ve got care responsibilities, it’s really hard to do a full-time job at home on top of that right now. Also, we should just expect stuff to go wrong. It will!
Last week I had my monthly meeting with my oncologist. I would have written sooner but HOLY SHIT ONLINE TEACHING IS A LOT OF WORK. Also I spent the weekend building a bed and wiring up a pedalboard (unfinished business from the summer). So here we are.
Everything is going well. My tumour marker is nice and low, my blood pressures are stable, and I totally forgot we didn’t get my neck scan results last month. Turns out they were fine too.
Getting my bloods done was a thing, though. I went in to the Jewish General Wednesday morning and the cancer centre was a zoo. Or rather, there were 2-3 nurses working for drawing bloods, social distancing rules in place, and a lot of unruly and angry elderly people. The patients were overwhelmingly white. Two of the nurses were black. At one point there was a woman who was refusing to move. People were crowding the door, and “taking a tone” with the nurses like they were slacking. I can’t believe the amount of rudeness and outright hostility they are having to put up with. They are doing their jobs well and carefully. I understand people have appointments and everything is behind schedule, but if I’ve figured out that if your bloods are delayed at the Jewish, your doctor is too, surely the other patients can as well. I was not sure how to intervene but if it happens next time I’m there (my October blood appointment is at 9am so I imagine it could well go down like that) I will need a plan in place. All I did this time was tell the nurses I appreciated them and was sorry for all the BS they had to put up with. But it was a really racist scene.
The big cancer news is I’m on a vacation from Lenvima for the next couple weeks. I have a sore on my foot that will not heal. So the idea is that I’m doing well enough to go off the drug for as long as it takes to heal. Then I’ll go back on. I’ve been off since Friday night. I already had to go off one of my blood pressure meds as I was getting super dizzy Saturday while building the bed (Carrie wound up having to do more bending because I kept almost falling over). My digestion is changing as well–for the better. Tonight I ate a salad and…so far so good. And my foot isn’t all healed but I went for a walk tonight without taping it up and there was no pain, so it’s already better. My hands also feel better, though they’re still a bit sensitive. But I played bass for a few minutes today sans gloves and…my hands didn’t mind.
I’m curious what else I’ll notice going off it. I’d been wondering how I was ever going to get to eat a pizza (you know, the kind with mozzarella) again. Well, I think soon I’ll be able to once my stomach repopulates its biome. That’s probably not how stomachs work but whatever, you get the point.
I’m rooting for my foot to heal, but perhaps not so fast I don’t get to optimum pizza readiness. I think I’ll also get some ice cream while I’m at it.
This is the fourth in my series of posts on how to record your lectures.
Tl;dr: a little focused practice up front will help a lot: spend some time experimenting with positioning the microphone, and how you address it. Record a bunch of short takes saying the same 1-2 sentences and then listen and see what sounds best. Develop a performance style and persona matched to the medium.
Microphone technique is a huge topic and something a topic covered at length by professional singers, voice-over artists, engineers, and producers. Your goal in recording your voice is to produce something phonogenic, to use a term from Michel Chion. Ideally your voice recordings are “pleasing to hear,” which means they conform to the conventions of recorded voices. Do not confuse this with how your voice sounds in the room or in your head. Think of your voice more like clay you are moulding.
Step 1: make your space: microphone placement, room setup and level setting.
Close the windows, the door and turn off the fan. If you can. Make your space quiet, but don’t spend time worrying about incidental sounds from partners, pets or children–it’s not worth it–except the partner should not be having a loud conversation in the same room as you’re recording.
Once you have some absorption up behind you, you need to experiment with where the mic is relative to your mouth. Plan on spending an hour on this and then never thinking about it for the rest of the term.
A condenser mic, like the Blue Yeti that I recommended in my last post, can sit happily on your desk facing in your general direction. Probably 1-2 feet is a good range, and you don’t want it pointing exactly at your mouth. Try aiming it at your forehead, your nose, your chin, and your throat. If you aim at your mouth, aim for the side of the mouth. Then record a sentence and see which is most pleasing. You’re looking for clarity of speech, not too much sizzle, and not much room echo at all. Go listen to a CBC or NPR interview as a reference.
Whatever you do, never aim the mic directly at your mouth. The reason for this is simple: if you are going head on into the mic, it will overemphasize all sorts of mouth sounds. Plosives, which are the little explosive puffs of air that occur when you say “plosives” can boom; sibilance — the ssssss and ttttt sounds — get extra sizzly. Breath sounds get louder (great if you’re PJ Harvey but not if you’re trying to tell your students about a term that will be on the exam). If you find an ideal position but still have too much plosive sound, you can use a pop filter, or make a DIY one.
If you’re using a dynamic mic, like the SM7 I use, you want to get closer in. You can get right up to it, though I still some prefer a distance of a couple inches. Getting too close to any mic will produce a proximity effect, which is cool for that FM “voice of god” sound but might well be too much for most usage. It will also emphasize mouth sounds.
Also, if you are recording into a program that gives you a measurement of how loud your voice is coming in, I recommend coming in around -15db for your maximum levels. Note on loudness measurements: 0db is as loud as the medium will take, so all levels are measured in negative numbers: -10db is louder than -20db.
Step 2: technique. This is a bit more advanced but easy to grasp.
Baseline: Set yourself up in a steady position. Most profs will record sitting down but in most cases you’ll get more vocal power if you do it standing up. (With my paralyzed vocal cord, this is no longer the case for me, so YMMV). Once you have your position, that’s your baseline. When recording singers, I always put a book on the floor so they know where their start position is. Bonus: I try and pick an appropriate book.
Move as you get louder and quieter: You can change the sound and volume of your voice by moving. To produce an even sound, move back a little when you are louder, and move in closer when you are quieter. This produces the effect of dynamics but keeps the volume more constant, which is what listeners expect when they are listening to recorded voices. This makes lots of sense for rock singing, but a good lecture also has dynamics. You’ll want to practice this trick: ultimately, you want places to move to that also sound good (see step #1) so that you’re not, for instance, adding a bunch of sibilance as you edge in on the mic.
Step 3: performance(and media theory 101 applied to online teaching)–reinvent your persona
I’ve spend the summer listening to my prof friends complain about going online to teach their courses, losing the live interaction of the lecture hall or the seminar room. I’m right there with you. But your goal should not to be to reproduce the live lecture experience in a recording. Your goal should be to play to the features of the recording. This is media theory 101, but also good pedagogy.
The theatre is closed for Covid. I always think of lecturing as a performance. Many profs have stories of running into students somewhere around town, and the students essentially shocked to discover we exist outside the classroom. We are characters, whether we want to be or not. In a live lecture hall, we are doing something like theatre. I embrace this, all the way down to the stunts I pull to get my students attention, like staging a live dialogue in order to show how the conventions of shot-countershot editing work, or bringing in a bunch of flags and setting up a semaphoric telegraph to show that you don’t even need electricity for near-instantaneous communication. In the lecture hall, I address my students as a collective. When I say “you,” I mean “you all”–the second person plural. And of course I can also read the room. That’s not going to work in a recorded lecture.
So you need to find models that work for you. Take some time and listen to some spoken performances–radio shows, podcasts, radio theatre, spoken word, poetry (though watch out for “poet voice”–don’t do that), sound art, whatever, and see what grabs your attention as the kind of role you want to perform for your students.
Step 4: get used to being a personality
This is not the classroom. People are generally shy about hearing their own voices recorded until they are used to it. I don’t have any great advice here except that it’s normal to feel creeped out by the sound of your own recorded voice. The thing is, what others hear sounds nothing like the voice in your head. So do your best to ignore that and instead think of the recording of your voice as a mix of that sonic clay I discussed in steps 1 and 2, and the persona I’m telling you to construct in step 3.
Step 4.5 [Edit]: On the Facebook thread discussing this, Bob Fink (musicologist at UCLA) pointed out that even though he does not normally write out his lectures, he does write out his recorded lectures so he can focus on performance. And avoid tangents. Dan Ryan, (sociologist at U of Toronto) chimed in to say the same thing and added these helpful linkson how to write for radio. Thanks to both of them. I have no tried this but I think I will go for a little more structure.
Step 5: editing and mixing(most people should skip this part)
I’m going to skip the primer on signal processing, but for the nerds, here’s a little more detail on what I do for myself. Absolutely none of this is necessary for a decent sounding lecture.
–downward expansion: because of the paralyzed vocal cord and a bit of asthma, I’m a loud breather on mic. An expander makes the breaths quieter than the speech and makes my voice sound more, well, abstract. And it’s preferable to a noise gate which gets rid of the breathing entirely, and therefore makes me sound like an android.
–about 2db compression on the peaks, medium attack with the equivalent makeup gain (more radio-like).
–a little EQ, sharp high pass around 80-100hz, boost for clarity and presence (again, 1-2db). Exact frequencies depend on the mic, and my SM7 has an on-mic mid boost I use.
And that’s it, though I will be using lots of other sounds in my podcasts for students, and some of those will be processed.
I will leave you this handy guide should you require more advice on signal processing (not mine, just a meme I like):
The #1 question I am getting from people is a variation of “what do I need to buy to record my lectures?”
This is actually mostly the wrong question, but it is a question people have, so let’s answer it.
The first thing you probably need is a moving blanket or thick quilt, as explained in the first post of this series. Canadian Tire sells moving blankets for $20. That is the single most important thing you can buy to improve the sound of your lectures. I am not kidding.
The second post in my series is here. It tells you to make shorter recordings and not to listen to them all the way through once you know what you are doing.
In this post, I’ll deal with hardware and software, and give simple and slightly more complex solutions.
In what may be the final post in this series next week, I’ll talk about recording techniques.
The tl;dr is the simple solution below. I already told you what to buy if you’re going to only buy one thing, which is a moving blanket (or maybe you have a nice quilt you don’t mind hanging up?). You don’t absolutely need to buy anything to make a decent podcast for your students. You just need to record it well. But for those who want to know more….
What you need:
Technically, nothing other than the blanket and some headphones or earbuds. Your computer has a built in mic and you have probably been listening to people talk into built in mics all summer. Is it good enough? You tell me. Often you get a ton of room echo (a well-positioned moving blanket helps a lot with this), and the mic picks up all sorts of other noises. I think most people’s Zoom presentations using built in mics in untreated rooms sound like ass. But sometimes they sound fine. Will you sound fine? Try making a recording and find out.
So if you don’t want to use the built in mic, then you need
a way to get sound–specifically, your voice and not a ton of other sounds–into the computer.
A way for you to hear what you are doing.
A way to edit that sound.
***And, this is shockingly important for how little attention anyone pays, you really really want to hear a bit of your own voice as it goes into the computer.*** People talk a lot about eye strain and Zoom fatigue, but without hearing a bit of your own voice on the way in, it is very likely that you’ve been yelling at your computer all day every day for those epic Zoom meetings. Yelling makes most people tired eventually.
What’s wrong with the built-in mic?
Maybe nothing. You could do ok with a moving blanket and the built in mic.
But everyone I’ve spoken with who has used an external mic for recording has said they think their voice sounds better. There are a lot of reasons for this, but let’s just say that while the computer microphone is a miracle of miniaturization, there are some compromises there because it’s right next to a loud environment (the inside of the computer) and doesn’t know where sound is coming from.
What’s wrong with the mic on my Apple wired earbuds?
See above, plus that awful scratching sound when it rubs up against your clothes. If you’re going to wear a mic, there are better options.
A Caveat
I am going to recommend specific products. We are living in an age where the cheapest stuff outperforms equipment I used in actual studios in the 1990s. There are a gazillion good options. I’m just saying these will work. I’ll explain what I use at the bottom.
The simplest solution
After acquiring your moving blanket or quilt (I AM NOT GOING TO STOP HAMMERING THIS POINT), you could invest in a simple all-in one solution plus a set of headphones. There are lots of good options but the one I’m recommending is the Blue Yeti Nano. It’s an all-in-one microphone and audio interface (the microphone converts sound into electricity, the audio interface converts electricity into a data stream). Want an even cheaper solution? The Shure MV-5 costs less, but I haven’t heard it or used it.
I recommend it for several reasons:
It is dead simple to use.
It sounds good enough. People argue about sound all day every day on the internet. Trust me, it’s good enough. Carrie just got one and we put it through its paces no undergrads are going to complain about the sound quality of her lectures.
It plugs into your computer and doesn’t required special software to run.
It comes with a stand.
You can hear your own voice as you speak into it if you plug in the headphones I am recommending.
It is recommended by speech therapists.
The Yeti also has a lot of cool accessories. I recommend a broadcast arm. I have one attached to my desk, which means when I’m not using the mic, I just push it out of my way.
A couple things to know about the Yeti. You can turn your voice on or off in your own headphones by pressing the button on the front. You want it on. There is a button on the back that lets you choose a circle or a tiny heart shaped thing. Choose the heart shaped thing. That button is a pattern selection. The circle is an omni pattern which means the mic picks up everything coming from every direction. You don’t want that. The other pattern is called cardioid (cardio–heart) and picks up mostly what’s in front of the mic. If you aim it at yourself correctly, that’s you, and behind you is the blanket you’ve hung up, which means less reflected sound goes into the mic.
The Yeti has a couple downsides: it’s a newish product so its durability is in question. And it’s a condenser mic, which I consider a liability for most people recording at home. More on that in a moment.
You also need a decent pair of headphones. There are three important things in headphones for this applications:
They are comfortable on your head.
They are closed-back. Open-back headphones leak a lot of sound, like when you can hear the music pouring out of someone’s headphone on the metro. You want less leakage. BUT open-backed headphones are less hard on your ears, so for Zooms or everyday listening if you’re not sharing space with someone close by, they’re a better option.
They must not be wireless. You need to plug them in. Bluetooth introduces latency which means you will hear your voice some time after you speak. This is an incredibly psychedelic effect but not great for when you want to deliver a lecture.
The Audio Technica ATM-H50X is a good choice in the $100+ range (they are “studio quality” and are actually found in actual studios sometimes), but really any headphone that doesn’t leak and is reliable will do. Just look for “closed back” and make sure they’re comfortable to wear.
A More Complex But Better Solution
The Yeti suffers from one problem. It is too sensitive for most home environments. Manufacturers sell things with specifications, and with flash, so something that sounds clear and bright in the store may be too good when you get it home. And some people read frequency responses and think that bigger is always better. (I know a scholar who has debunked theories of sound fidelity, but let’s leave that aside).
So if you’re comfortable with a little more tech, I have another recommendation.
A broadcast arm. I like and use the K&M 23850, which also comes with an XLR microphone cable (XLR is just a standard, like USB–it’s defined by the shape of the plug and the type of signal it carries). Alternatively you could buy a desktop mic stand and an XLR cable long enough to get from your mic to your audio interface.
An audio interface with an XLR input and a microphone pre-amplifier. The dead simplest one is the Shure X2U, but it’s actually not handy to have all your controls attached to the mic. On the plus side, you can plug it right into the mic and no longer need an XLR cable. But, I recommend the Focusrite Scarlett Solo. It’s nice to have the controls on your desk. And trust me, it’s good enough for recording your lectures. Hell, you could make a record with it if you wanted to and if people are complaining about your analog-to-digital conversion, your problem is the music, not the analog-to-digital conversion. Another inexpensive option is the Audient ID4.
A good dynamic microphone. The Blue Yeti Nano is a condenser mic, as is the element in most computers. These have extended sensitivity and high end, which are great for some applications but not others. It is not as well publicized as it should be, but fancy studio condenser mics often sound worse in home recording setups than cheaper mics. Dynamic mics are less sensitive and have less of a frequency range. For recording lectures at home this is a actually good thing. It will make your voice sound more polished and radio-like. The can’t fail recommendation 99 times out of 100 is the Shure SM-58, which is used on stages all over the world and which could be used as a hammer and then returned to its mic duties and would probably still work (DO NOT TRY THIS AT HOME). There are cheaper clones but I don’t know which ones are good. Jentery Sayers just mentioned the also-not-too-expensive Rode PodMic, and he knows a thing or two about audio so I trust his recommendation. If you want the full on radio sound, the Electro-Voice RE-20 and Shure SM-7B are found in studios all over the world. If you get in close, these mics can give you that “voice of god” sound — works for men and women. However, they have switches and stuff on them and are a little more complicated. BUT good dynamic mics are hard to break, and so you can just mess around with them. Another option some people use is a clip-on lavalier mic (a “lapel mic”), but I haven’t, so I’m not going to cover those except to say that if you go this route, watch out for shirt noise.
You still need some headphones.
So in this setup, which is more like what a studio uses, your mic turns sound into electricity, which goes down the XLR cable, then the preamp gives it some more juice, then the interface turns it into data. So you’ve disaggregated the parts of the Yeti Nano into a bunch of different things. This gives you more control, though.
The payoff for the setup is that you will get a better sound in most cases for home recording. The downside is it’s more complex. You now have to learn a mic, a preamp, and an interface. It’s easy but it’s learning.
If you’re new to this, I recommend the SM58 because it’s cheaper and will sound good 99 times out of 100. Beyond that it’s sort of like recommending nail polish colours (a newfound interest of mine) or neckties or something. It makes an aesthetic difference but people have different opinions.
Software
If you are using PowerPoint, you can just record your audio right onto the slides. This is the easiest solution.
If you want an audio editor, Audacity is free and not too hard to learn. There are lots of tutorials. It’s really no harder to edit sound than a word processor document. I teach it to my undergrads and have them making wacky sound art in less than a single 80 minute class session.
If you want easy to use audio-editing for podcasting, Rogue Amoeba has a good suite: Audio Hijack lets you record sound from anywhere on the internet, Fission lets you edit different kinds of audio together, and if you want to get super clever, there’s always Farrago for a soundboard.
There are tons of other good options, and even video programs like Camtasia have audio editing.
What about a camera and what’s this I keep hearing about light rings?
I am so not your guy on this question. But: if you’re recording into a laptop, raise it up so you’re not shooting from below (that’s how they shoot the “bad guy” in Hollywood movies) and use some good light on your face. Carrie and I got cheap Logitech light rings for our faces, though they are supposedly problematic for glasses. But since I’m not setting up a full lighting rig to record audio podcasts, it’ll do.
What I use: I have an actual home studio. We record and mix actual music and sound art sometimes. So I have a lot of choice. I love the SM7 on my voice for the voice-of-god effect. This summer for Zooms I have been using a Shure KSM-32 condenser mic, which I just told you not to use, but I’m good at this sound recording thing and it has a couple advantages I like (and they are used for some well known podcasts). My interface is an RME Babyface, which is a very fancy version of what the Focurite Scarlett does for more money (though it’s 2 models ago so you can pick them up used cheap–they sound amazing but the software is, ah, not intuitive). I use the K&M broadcast arm and move the mic back and forth every day and smile doing it. For software, I haven’t decided, but probably Ableton Live, which is made for electronic musicians but has lots of power for instantly editing lots of sound together. I know it really well. I also know Apple Logic well; it might also be good for my purposes. I would also like to be able to insert chapters into my audio so students can find stuff quickly, and so if I can do it with either of those programs, I will probably pick that one. For recording I use the ATH-M50 headphones, though for everyday use and critical listening I use Sennheiser HD600s. Open backed headphones are great for listening and not as hard on your ears.
A colleague just wrote to ask where I’m at with my intro course. My friends are posting (or writing) about the technologies they are trying out, etc. Here is where I am at as of today.
I have too many readings in most places and not enough in a few.
Podcast lectures drop on Thursday. There will be listening instructions, including, “do not listen to this in front of a screen.”
Tuesday is semi-synchronous group work. Groups will produce 3-4 short projects during the term each themed around a unit (eg, when we do ecology, they’ll do a supply-chain analysis of a media object). Randomly assigned membership, but control for what time zone the student is in. Peer evaluation will be part of the group grade.
I might flip Tuesday and Thursday, we will see.
A prof office hour during class time (that way everyone can make it if they are in the time zone), on the day that the groups aren’t meeting.
Some office hours sprinkled in at weird times for people in other parts of the world
1-2 readings a week (1 if it’s hard), some supplemental stuff for the keeners
Weekly surveys whose answers will inform the following week’s lecture
6 quizzes that are multiple choice, machine graded, and for which they can use any resource they want. Lowest score is dropped. Our software lets me randomize answer order, question order, and will automatically swap out questions (so I could have 4 different ways of asking about the same issue).
Escape hatch for accessibility issues (I can’t even begin to predict the kinds of accommodations people will need)
There may also be a “help make the course great” section where students can illustrate my lectures or do other things that might be useful for one another.
A late work policy I haven’t yet figured out that protects the TAs and I from getting labour dumped on us at end of term but that also is less draconian than usual given what people may be dealing with
I cut my hair finally, so students will get to vote on what colour it will be in November.
There will be 4 big units if I can do it all (might cut to 3 when I see the readings laid out before me). Economy, Ecology, Technology, Ideology. First two weeks are intro stuff: Anatomy of AI, and Encoding-Decoding, both of which will serve as “keys” to unlock and frame the rest of the course.
—
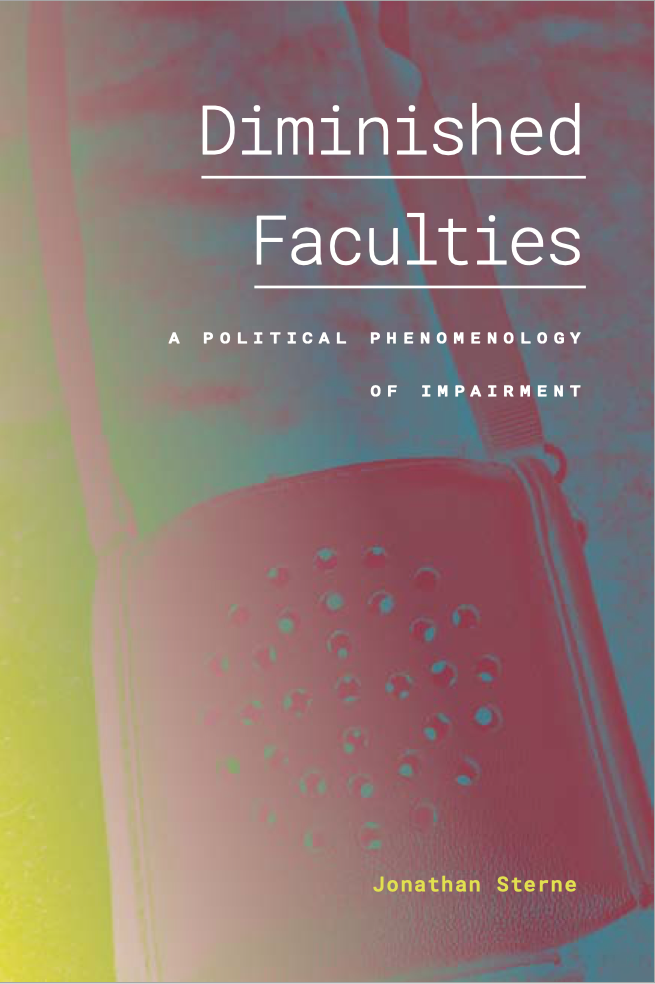
Just to square the circle on Diminished Faculties, I sent it back to Duke University Press yesterday. Reviewers need to sign off and I may need to cut a bit, but I’m happy with the work and all things considered, coming in a month behind the planned schedule is fine.
I’m taking 4 days off starting tomorrow, then will finish my fall syllabi by the 15th, then will take more time off in the 2nd half of the month. As much as possible.
So, um, the pony tail is gone. After 30 years of long hair, it is now the shortest it’s been since I was an infant. I love it. And it was time.
In the first photo I totally look like my dad with some genes from my mom’s side of the family. From the side I look like my brother.
I also had a beard from age 19 to age 39, which I had to shave off for radiation in 2010. I’ve loved being clean shaven ever since, and I strongly suspect that I will have no regrets about this move either. Some people change their look every couple months. Apparently when I do, it’s a Life Event.
This is not exactly a Covid cuts story, though.
Every spring, for the past few years, I would ask Carrie if it’s time to cut it, and every spring, Carrie says no. We had a deal: when it started to look bad, it would go. And it would go in spring so I could enjoy a full summer with short hair. But I think Carrie was pretty attached since she never knew me with short hair. So every spring she said “not yet,” until spring 2019, when she said “maybe next year.” But this spring, she still didn’t make the call.
In the end, the turning point for me was The Drugs. One of the side effects of Lenvima is thinning hair, and my hair has been getting thinner and finer for the last year or so. It’s not like chemo where it just falls out, but this summer has been some kind of tipping point where I really started to notice after 16 months on the drug. My pony tail no longer filled out the barrette, which meant it slipped around, which I did not find to be a pleasant feeling. Suddenly, long hair started to feel more like an annoyance than a decoration. I was ready. Plus, on Zoom calls I already look bald. You can’t see what’s in back anyway.
It being Covid time, we decided to do it at home. I asked a few male friends how they did it and what they did. I ordered a clipper a couple weeks ago. Finally, last night after dinner, we sat down on the couch with Carrie’s computer to watch hair cutting videos. After a couple more generic videos, I asked for a search for “home hair cut balding men” since I wanted some ideas for the horseshoe that would replace the pony. The third one in was “three essential tips” or something like that and we thought it was going to be hair cutting tips, but it was about Being A Confident Man and What Women Like. I joked that she was going to start getting served Jordan Peterson videos.
Finally, Carrie asked — a few times and different ways — if I was ready. I suspect I was considerably more ready than her. But then, she was the one who was going to actually cut it and look at the result all day, and despite being together for over 30 years, she has never known me without long hair. I thanked my pony tail for its service, Carrie took a final photo of the back of my head, and then we did the haircut, checking regularly in the mirror at each length to see what my ideal length would be.
I had decided I wanted some hair, rather than the full shaved head look, so we had to figure out a plausible length. I like the result. I am surprised at how little grey there is outside the temples. I’m sure that will change with time (and I absolutely do not mind) but I was expecting more.
When we were done I handed her my barrette and said, “I bequeath this to you”–along with most of my other hair care supplies. Right now, her hair is longer than I’ve ever seen it, so she’s already been swiping my barrettes. (It started out as just “drummer hair” and then kept going.)
There’s only one issue. I somehow look more like a dude now. The pony femmed me up a little, which it an important part of my self-presentation and frankly my self concept (to say I have an ambivalent relationship to cis-heterosexual-masculinity would be an understatement). Happily, gender nonconformity has come a long way in the last 30 years, so I’ve got lots of options to experiment with. For now, I am digging the nail polish, which also has the functional advantage of protecting the fingernails on my right hand for strumming.
Oh, and when I put on a shirt, I have a reflex to pull my hair out of the collar. That’ll go away on its own….
—
I started growing my hair out in high school, and apart from one unfortunate cut right before graduation, where the barber took off a lot more than I asked him to, it has grown out ever since. There were occasional trims and shapes at Curl Up & Dye in Minneapolis, and later Carrie would occasionally just trim off the ends with a hair scissor.
I am not sure the original motivation, though it was a thing among some of my friends, and I watched many male musicians with long hair so it seemed normal. It just became part of “my look.” And it was the one part of my look that consistently drew compliments from strangers, which is not a small thing for a fat person in our culture.
Still, in my 20s I was more than once heard to remark that “I don’t want to be a 40-something professor with hair down to my ass.” In the end, only reason that didn’t happen is male pattern baldness.
While searching for snarky sports commentary at bedtime two nights ago, I stumbled across an interesting Twitter thread on finishing a manuscript (because I was tagged in it).
I am a big believer in the old Walter Benjamin line about how manuscripts aren’t finished, they are abandoned. But the key here is the verb abandon.
In finishing, you abandon the manuscript over and over: to get it under review, to get it back under review after revision; to deal with copyedits; to deal with page proofs. And that’s in the best of possible circumstances. There are even more little abandonments along the way. Today I “finished” a chapter I have been fighting with (on fatigue, draw your own conclusions) since mid March. It was also the least developed chapter of the first version of the ms that went to the press last year. Yeah, I know a lot is going on and most people aren’t writing. I am not saying that you should be writing. But I am absolutely driven to write. At least this book because I know why I am writing it and for whom (one of the people for whom I am writing is me).
Even so I ran away from this chapter a couple times to work on other chapters because I just couldn’t figure out how I wanted to make the argument work and how it should be presented. But at the end of last week I was finally ready to do what needed to be done. Now it’s on Carrie’s desk (aka in-house peer review) to see if I can cut even more before showing it to people. She will find the parts that don’t make sense, or that should be brought out and also tell me whether I should cut a 15-page section on medical models of fatigue down to 2-3.* Then I’ll edit again next week for half a day and send it to some people (and others will get it as part of the revised manuscript when I send in the whole thing).
All this is to say finishing is not a definite act. It is many many small acts.
I think it’s Robert Boice in Professors as Writers who says to “write before you are ready,” but regardless of who said it (if he said it, he wasn’t first), the same is true about finishing. When I send the MS back to Duke at the end of the month (fingers crossed), I will still have lots of prose editing to fix to make it more beautiful, and that’s assuming the readers don’t ask for more changes (they could). I will have all my image permissions (because I planned ahead) but there will be design issues to work out. It doesn’t matter. It’ll be finished when it goes back, and when any additional changes requested reviewers go back, when the copyedits go back, when the proofs go back, when it appaears in the catalogue, and only much later, when I hold an object in my hands.
*I am really trying to have shorter chapters this time. I’m at 55 pages/17,000 words. Not bad for, not great in terms of my targets.